Getting Started Guide

GoPiGo robot with distance sensor

Attach the Motor Brackets

Section Goal

In this section, you will attach the motor brackets to the acrylic body. When complete it should look something like this.

Complete assembly: showing motor brackets mounted to acrylic body in L and R holes.

Get Oriented

Parts
Steps

Place the acrylic body on your building surface. Identify the front and back of the robot (hint: the back has fewer holes).

Arcylic body - front has more holes than back of robot.

Set both motor brackets on top of the acrylic. The square side should be resting flat against the acrylic, with the half-moon elevated and facing the back of the robot. The bend in the bracket should be aligned to the outer edge of the acrylic.

Motor bracket hlaf moon cutouts should face back of the robot.

Gently lift the Left Bracket to check if it is resting on holes labeled “L”.  If so, Start Building!  If not, set your brackets to the side, flip your acrylic over like you are turning the page of a book. (The front and back should stay the same!). 

Now set your brackets on top of the acrylic again and check that the Left matches with L and the Right matches with R.

Order of hardware attachment: Shows a screw threading through a washer, the acrylic body, the motor bracket, and last a nut to hold the assembly together.

Start Building

Set the right bracket aside. Place washers on two of the short screws. Then gently lift the acrylic, with the Left Bracket still resting on top,  and insert the screws from the bottom, pointing up. 

Mounting the motor brackets.

Thread a nut from the top, onto the end of each screw. Hand tighten. 


Repeat this step for the Right Bracket. 

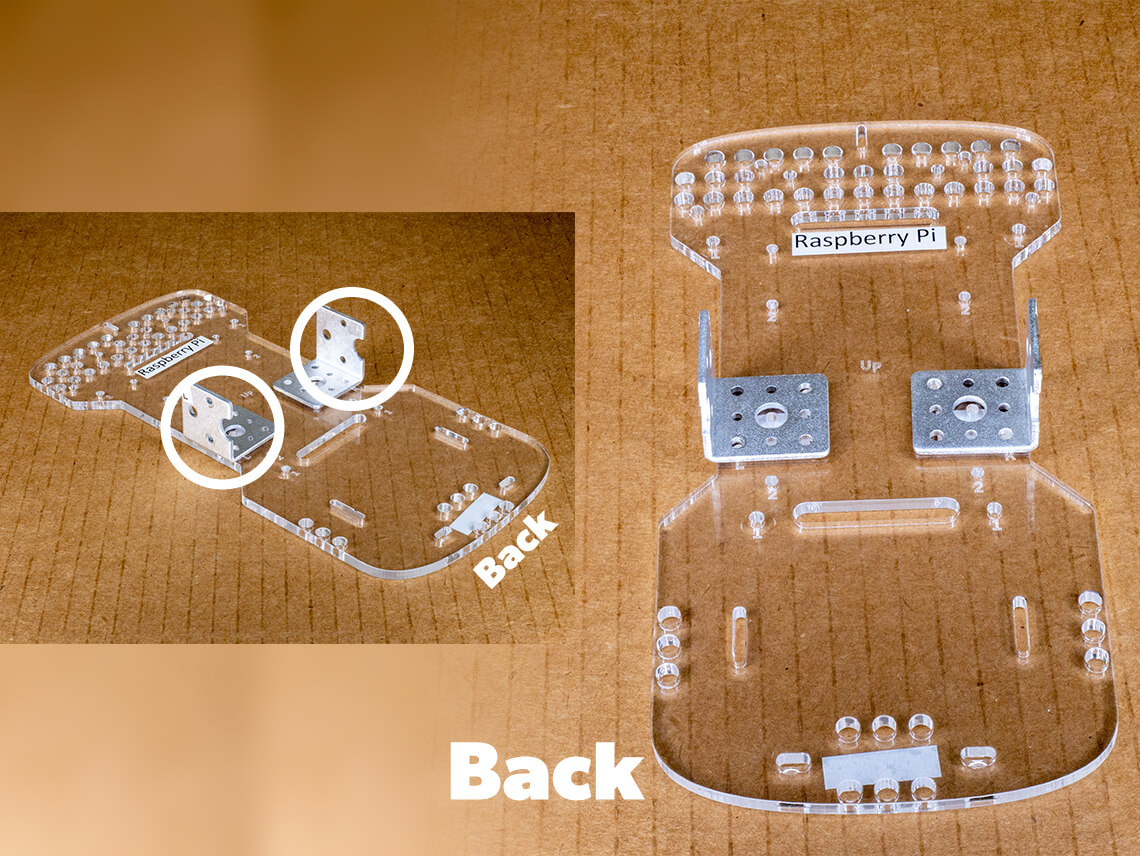
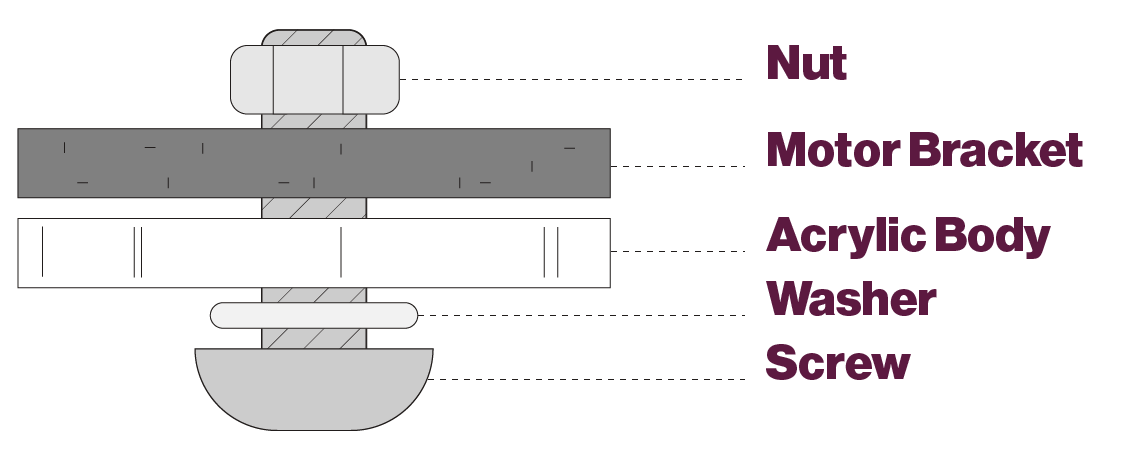
When the nuts have been hand tightened, flip the whole assembly over. The brackets should be touching your building surface. Now use the screwdriver to tighten each screw until the washer is flattened. You might use a pair of needle-nosed pliers to help hold the nuts while you tighten the screws.


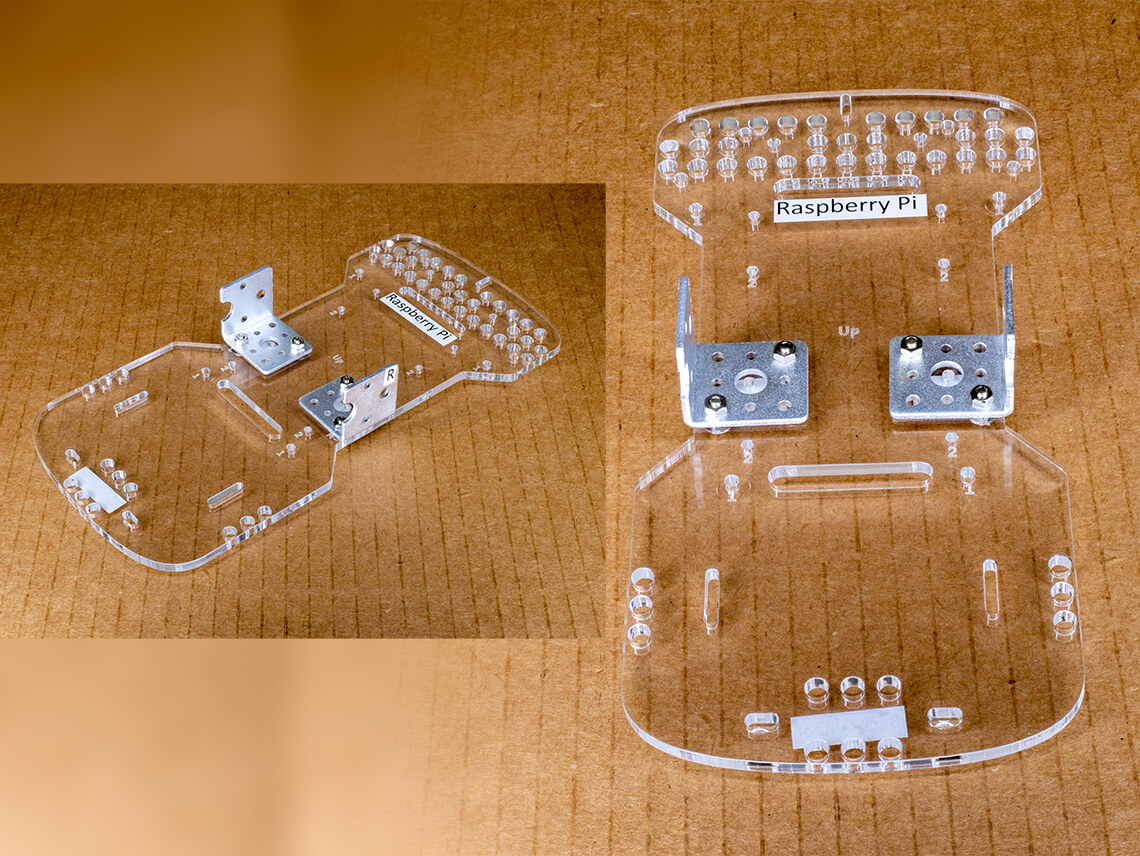
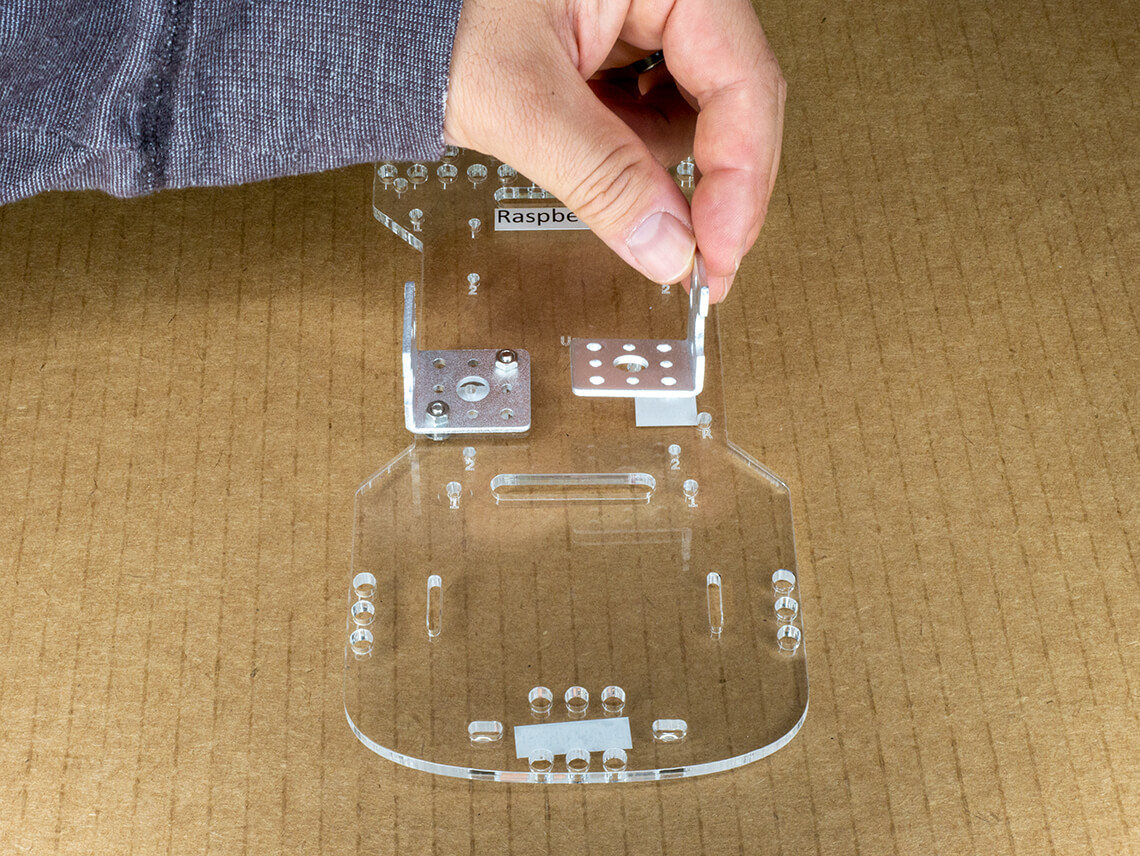
The brackets are now attached to the bottom of the robot.