fbpx

Getting Started Guide

GoPiGo robot with distance sensor

Attach The Controllers

Section Goal

In this section, you will attach the Raspberry Pi and GoPiGo Red Board. 

Goals for this section: Attach the Raspberry Pi computer, and GoPiGo red electronic board.

Prep Your Pi

Parts

Steps

Turn the Raspberry Pi upside down, so the metal pins are pointing down. 

Slide the microSD card into the slot on the bottom of the Raspberry Pi. Make sure it is in all the way.

The SD card will only fit in one orientation.

Insert microSD card into Raspberry Pi - only one orientation works.

Turn the Raspberry Pi face up, so the metal pins are pointing up.

Attach the Raspberry Pi

Parts

Steps

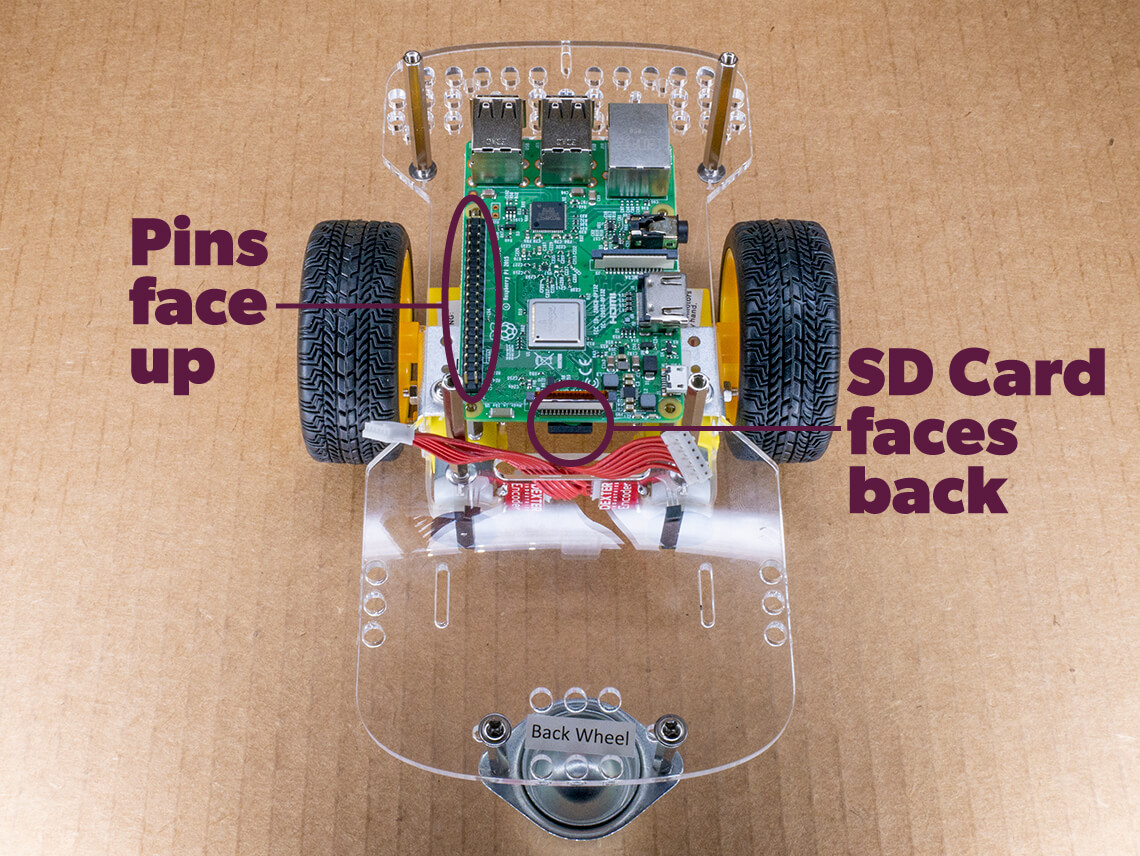
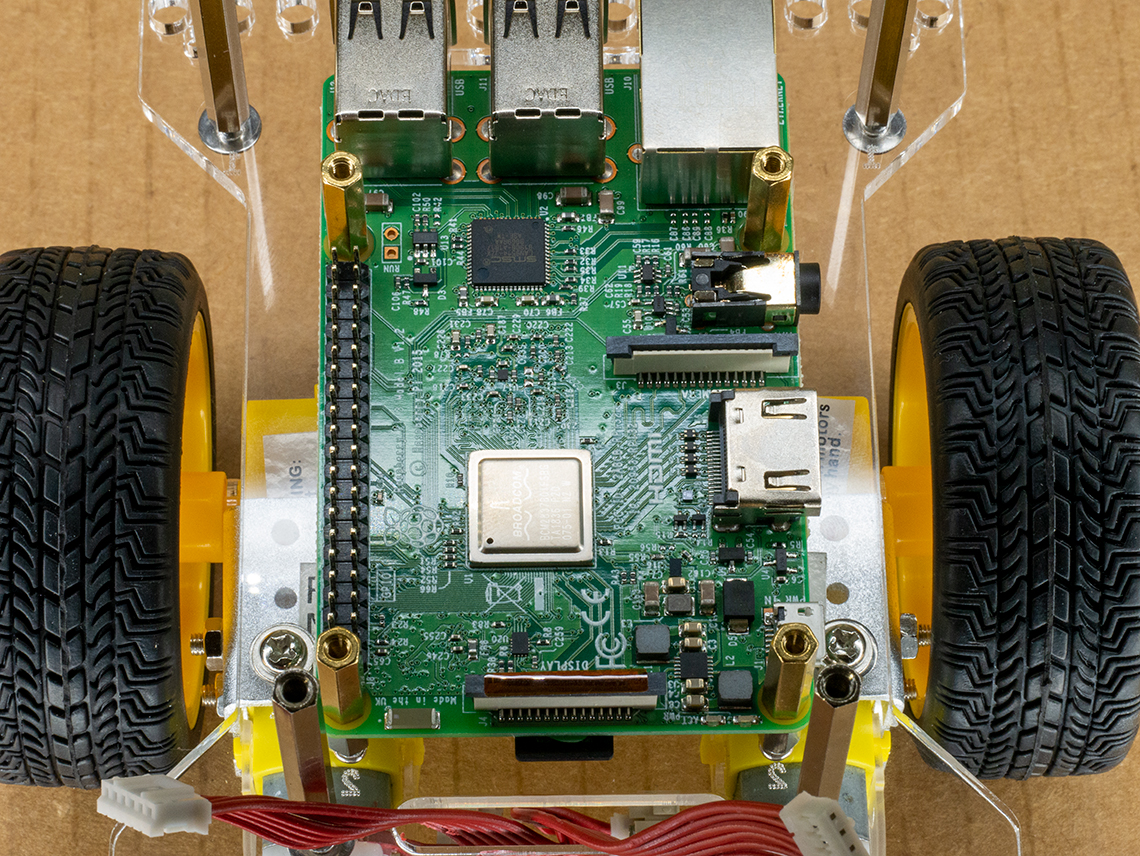
Align the Raspberry Pi over the short silver posts sticking out of the acrylic body. 


The pins on the Raspberry Pi should point upwards (as shown in the picture). The end with the SD card should face the back of your robot, which now has the caster wheel.

Align Raspberry Pi so pins face up and microSD card faces back of robot.

Screw the gold posts through the Raspberry Pi from above, and into the short silver posts. Hand tighten.

Gold posts thread through Raspberry Pi at the holes in the four corners.
Gold posts installed through Raspberry Pi computer.

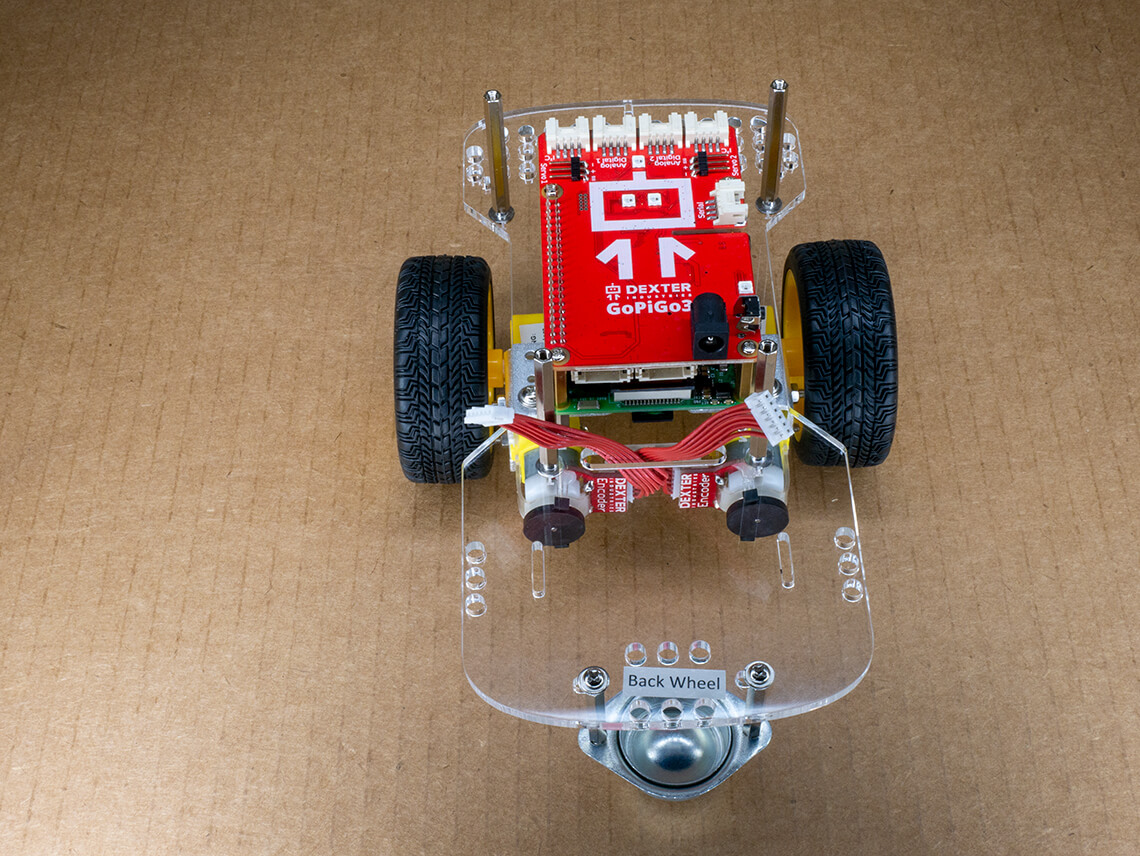
Attach the GoPiGo Red Board

Parts

From Controller Bag:

Steps

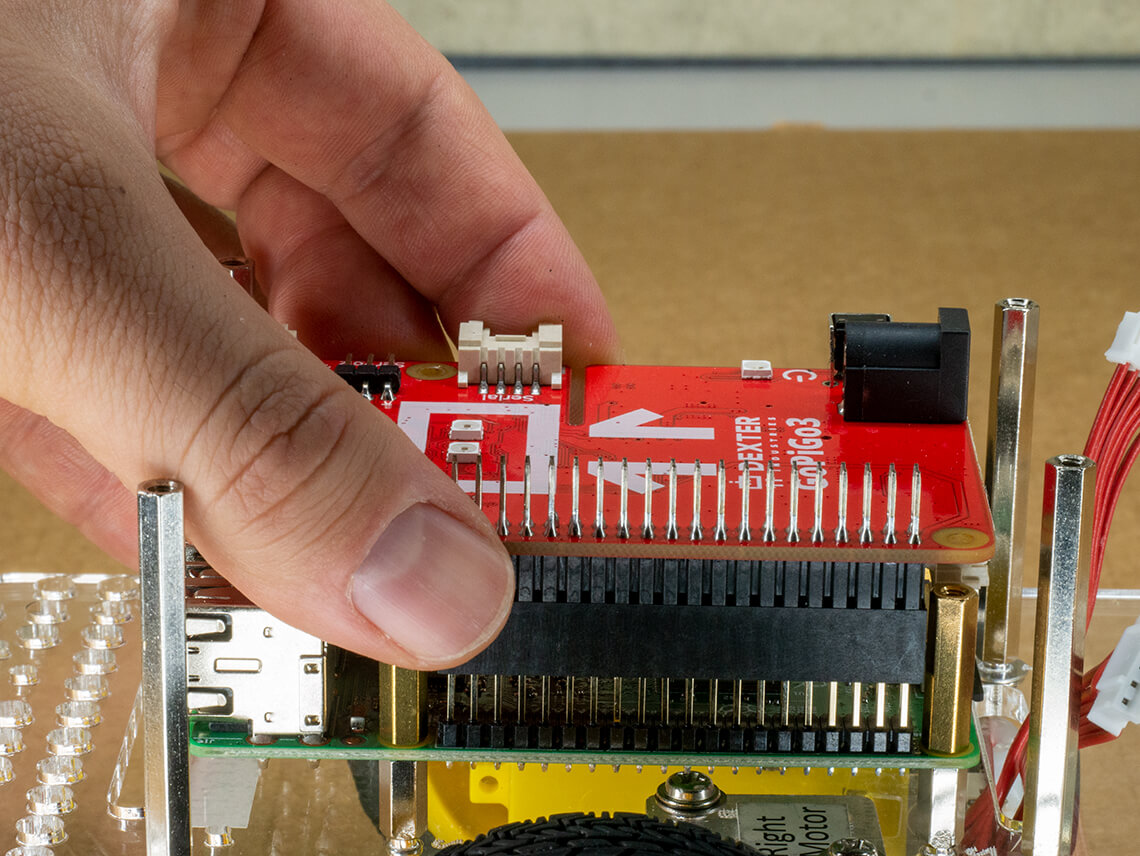
Take the foam off the pins of the red board.   

The GoPiGo3 is shipped with foam on the GPIO pins to prevent them from being bent. 

Be sure to remove the foam before proceeding to use your GoPiGo!

Remove foam from the GoPiGo red electronic board.

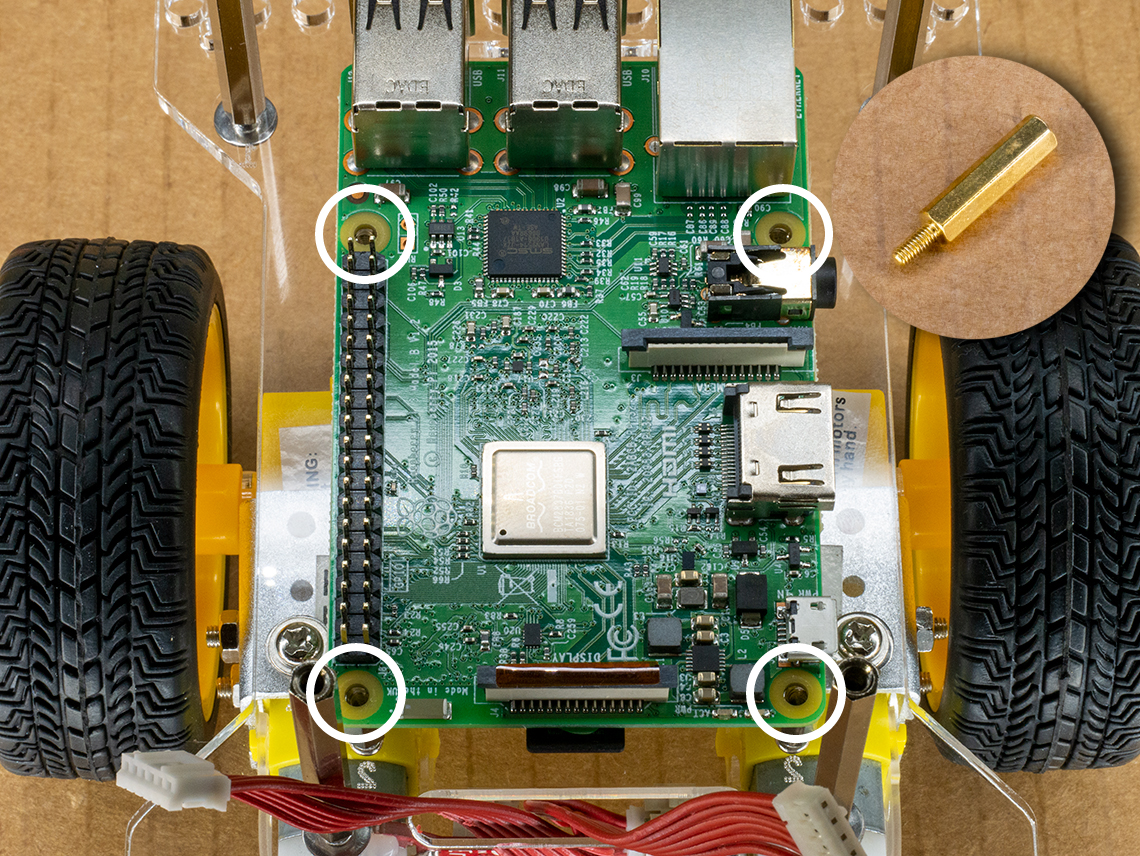
Align the black pin port on the red board to the Raspberry Pi pins sticking up, and slide the red board onto the Raspberry Pi. 

Press down gently until the board slides on securely.

Gently press the board pins into the black connector. Do not force.

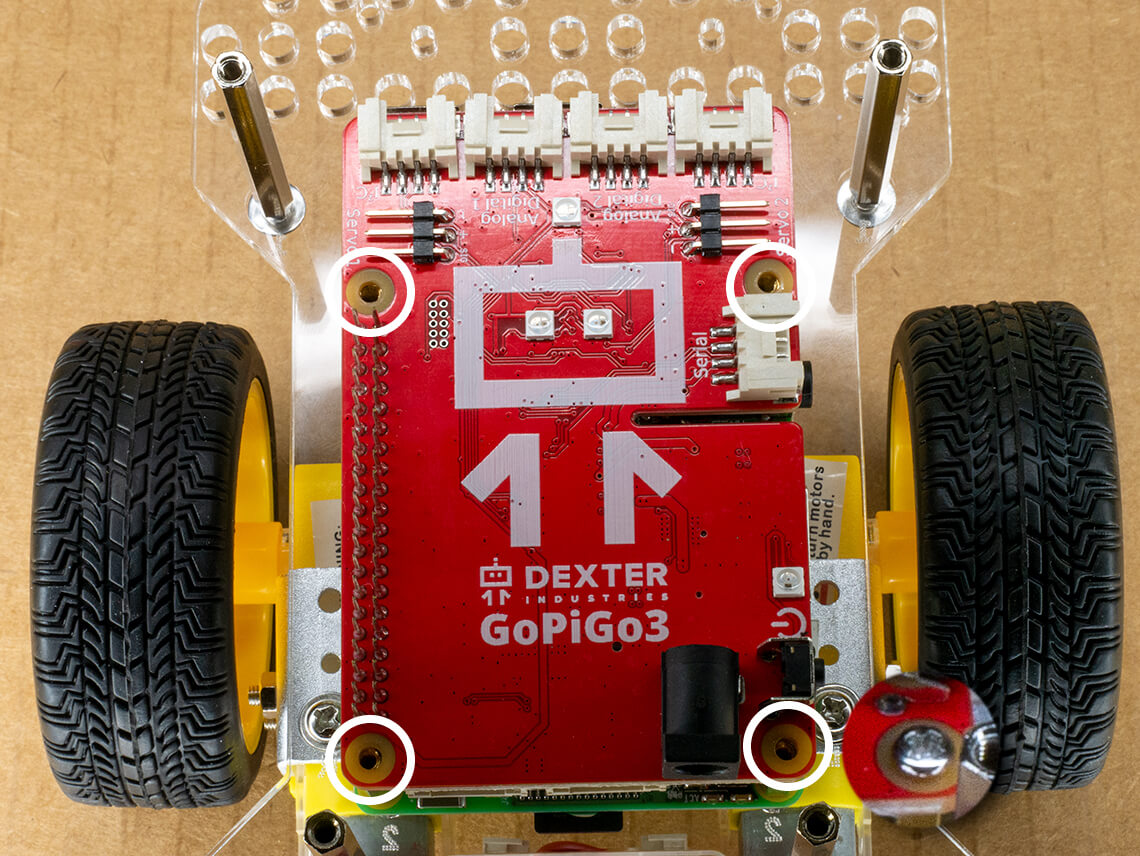
Use the 4 screws to secure the red board to the gold posts.

Use a small screw to secure the red GoPiGo electronic board using the four holes in the corners.